Saturday, November 17, 2012

Advent Countdown box project..

I know that Thanksgiving isn't even here yet but I would love to share this Christmas Advent countdown project with you! This little project is for counting down the 25 days until Christmas, which is fast approaching. It features the lovely little 2x2 boxes from Le Box Boutique.


 To make this project you will need 25 of the Le Box Boutique's 2x2 Kraft Natural Gift Boxes,
and Kraft Twist Ties, scrapbook paper, adhesive, craft knife. (optional: magnets, and embellishments)


 First I cut 2x2 pieces of scrapbook paper to cover 3 sides of the box. and then decorated them with flair, twine, punched pieces of scrapbook paper. Do this to all 25 boxes.


 Here is where you can customize what you want your Advent Calendar to be! I filled some of mine with shredded kraft paper. Inside I will add strips of paper listing something we will do as a family for each day. It could be helping a neighbor, playing a game, etc. These boxes could also be filled with candy or other goodies. I placed magnets on the back of my boxes and then placed them on a magnetic board I had handy. You could also use a cookie sheet if you want to go the magnetic route. Another idea I had was to make them into Christmas tree ornaments once they were opened.


 Do make your box into an ornament just make two slits using your craft knife.


 Then thread your kraft twist tie through the holes.


 And then tape the ends on the inside of the lid of the box!


Now you have an Advent Calendar ornament!


 I hope that you have been inspired to make your own Advent Calendar! It really is a simple and quick project that can be used year after year! It's a great way to include your whole family in the celebration of Christmas and to do something for others!


Shelley Haganman

Sunday, November 4, 2012

Holiday Berry Basket Projects!

I love these 
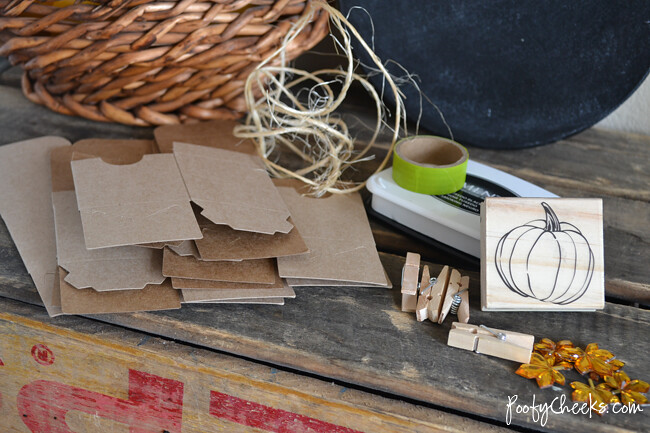
berry baskets by Le Box Boutique and I thought I would share some fun ways to create some holiday projects with them! First off is a cute little pincushion project. All you will need for this project is a square of fabric (mine is 11inches by 11 inches), some trim, a spool, adhesive, fiber fill and twine.

First take your piece of fabric and fill it with your stuffing! I just used fabric glue and glued all the ends to each other on the underside of the fabric cushion you have just created. Set that aside and trim the outside of your berry basket! Next, wrap twine around an empty spool. Now it is time to put the project together. Simply place the filled fabric cushion into your basket. Add some adhesive to the top of your spool and place on the underside of the basket. Let it dry and your project is finished. Just add some fun colored pins to the cushion!


 For the next projects I took 3 berry baskets, sprayed them with spray adhesive and then added glitter to give them a festive look! I used turquoise, red, and silver glitter. All these baskets have a styrofoam or floral foam piece sitting in the base of the basket.
************************************************************************************
The first project I made using my glittered basket is a photo holder! You will need floral wire, twine, washi tape, trim,number stickers, and adhesive.


 To make the cute little washi tape flag holder I simply took some silver floral wire and cut to the length I wanted them. Next, place them in the foam in the base of the basket. Tie the twine and fold a piece of washi tape around the twine. Just cut a "v" in the bottom of the tape and add some number stickers. Using the floral wire again cut a longer piece and roll the end around a pencil, flatten that end and now you have your own photo/saying holder! I added a photo of my nieces and a tag saying "Merry Christmas"! Decorate the box how you would like! I added pom pom trim and filled my basket with white shredded paper that I created with my home shredder! I also added some fun pins as well!

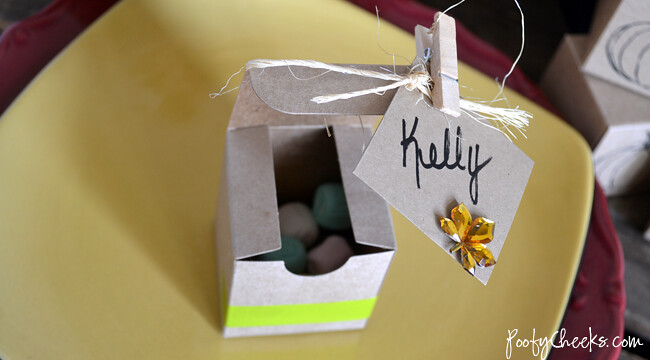
This next basket could be a photo holder, a place setting, or a way to display as message. You will need your glittered basket, shredded kraft paper, a clothes pin, twine, and lace.

First I took my glittered basket and lined it with some vintage lace that I had collected. I then filled the basket with shredded kraft paper. Next, I stuck a clothespin upside down in the foam in the base of my basket. This will hold whatever you choose to put in this project. I printed a graphic on the computer and added a "25" bingo piece! I also tied a piece of twine around the clothespin for an added touch!


The final basket is just a little table top decoration. You will need 2 small doilies, fiber fill, adhesive, floral wire, and decorations.


For this last basket I cut two small paper doilies in half and adhered them to the inside of the basket. Next, I filled the basket with some of the left over fiber fill used to make the pin cushion. Maya Road makes these beautiful transparent snowflakes so I taped a piece of floral wire to the back of them. After that I added some of my flair buttons to the center of the snowflakes and arranged them in the basket.

I hope I have inspired you to make something fun with Le Box Boutique's amazing berry boxes!

Shelley Haganman

Wednesday, October 24, 2012

Fall place settings

Hey ya’ll! I am Kelsey from the blog Poofy Cheeks and today I am excited to be sharing a fall inspired place setting that I made using items from Le Box Boutique! These place settings would be perfect for Thanksgiving dinner! I am hosting Thanksgiving dinner at my house this year, so I plan to fill them with after dinner mints for all of my guests.


DSC_6763 DSC_6757


To make these I gathered all of my supplies:


I stamped a pumpkin onto the lid of each box and then folded them. I wrote the name of my guests on the kraft tags and embellished them with a leaf gem. Then I attached the tags using twine and a clothespin. The final part was to add a strip of washi to the front of each box and fill them with the dinner mints!


DSC_6759 DSC_6760 DSC_6764 DSC_6761 DSC_6762


Date: Sun, 21 Oct 2012 15:16:30 -0500

Sunday, September 30, 2012

Friday, September 28, 2012

Halloween Luminaries

Hello everyone! My name is Shelley Haganman and I am here on Le Box Boutique's Blog as a guest blogger. Today I am going to share with you a fun little project using Le Box Boutique's amazing 1/2 pound Kraft Tin Tie Coffee Bags. Halloween is just around the corner and this project is perfect to create your very own cute, spooky, and totally safe luminaries. Let's get started!


Supplies you will need:
Le Box Boutique 1/2 pound Kraft Tin Tie Coffee Bags
Scrap book paper
Adhesive
Scissors and a sharp craft knife
Embellishments (stickers, twine, etc)
Battery operated candles (I found mine at $1 Tree--3 for $1)

Step 1:
Cut your Scrapbook paper 3 1/4 x 7 inches and add to the bag. (You could cut two of these pieces if you want to cover the front and the back of the bag. I chose to only cover the front since I liked the glow effect from the bag in the back).


Step 2: Add your sticker (or any die cut piece) to the front and with your bag open, carefully cut out the eyes and mouths so the light can show through the bag.


Step 3: Decorate your bag with embellishments (paper, Le Box Boutique Twine, stickers, ribbon, etc.)


Step 4: Add your battery operated candle to the inside of your bag. If you need more weight add some coffee beans to the bottom of the bag.


Step 5: Turn off the lights and enjoy your very cool and totally safe luminaries!


Monday, September 17, 2012

Guest Bloggers

Le Box Boutique wants YOU to blog with us!!! If you, or someone you know, would like to be a featured guest blogger email us at ahaun.leboxboutique@gmail.

Sunday, September 16, 2012

BHG!! OMG!!!!

Le Box Boutique has been featured in Better Homes and Gardens Food Gifts magazine, out on stands now. This is the second year (check out last Septembers Food Gifts edition)we have been featured!!!! To celebrate this amazing honor, we're going to give YOU a gift. We would like to see pics of the magazine in stores from around the country. Upload a pic to our facebook page, tell us what city and store the photo was taken and we will send you a FREE gift!!!!!!!

Wednesday, June 13, 2012

Tuesday, June 12, 2012

Wednesday, June 6, 2012

What to do With Brown Paper Bags

Check out this great blog for some crafty ideas http://www.grainsofearth.org/16-ways-to-upcycle-brown-paper-bags/

Monday, June 4, 2012

150 Followers Giveaway!!!!

We love our fans, followers and customers so much, we are doing ANOTHER BASKET GIVEAWAY!!!!!!! When we reach 150 followers on our blog, the giveaway will begin. Share our posts and contests with your friends to help us reach this goal and give away more great products from our shop as well as a few products from other shops that will be announced shortly.

Basket Giveaway

The winner of our 100 follower Basket Giveaway is..... Kirsten Thompson!!!!!! Congratulations Kirsten, We are so excited for you! We will be getting the basket ready for shipment over the next few days and we will post a pic of all the fantastic products that will be included. We would like to give a special thanks to Poofy Cheeks Boutique and My Thoughts Exactly for contributing products to our 100 follower giveaway!!!!!